skimage blob detection
skimage’s blob detection methods segment puncta in a specific range of sizes and will always create circular labels. These methods are ideal for quickly labeling circular puncta as shown in the image below:
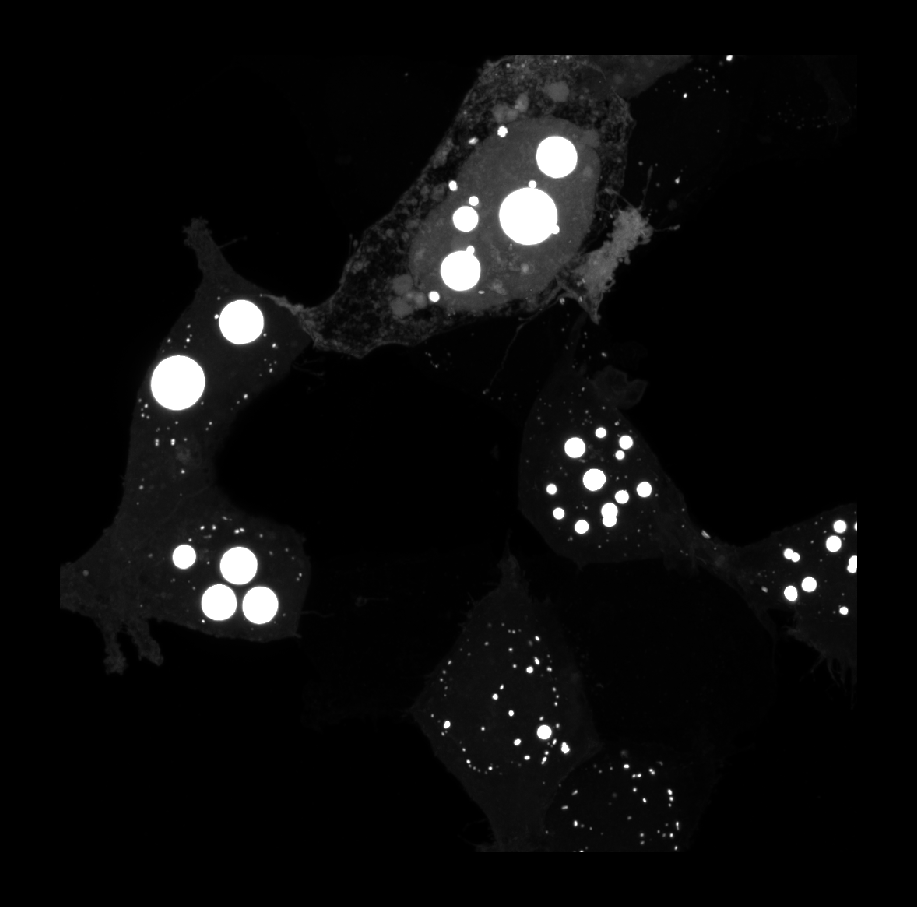
for getting rough counts in images like this:

or for providing seed points for watershed segmentation which will be discussed later.
The specific methods used are the Laplacian of Gaussians (LoG), differences of Gaussians (DoG), and determinant of Hessians (DoH) and can be found in the Method dropdown menu.
Here’s how the methods do in terms of speed where 1 is the fastest:
- DoH
- DoG
- LoG
and here’s how the methods perform in terms of accuracy where 1 is the most accurate:
- LoG
- DoG
- DoH
You can obviously see that there is an inverse relationship between speed and accuracy. I find that DoG is a good middle ground as it quickly approximates LoG well. Thus, DoG will be used as the example method in this guide. Additionally, the methods perform similar transformations to your image and you’ll notice that their parameters are nearly identical. If you want to learn more about these methods you can review them here.
Instructions
If you’re familiar with these blob detection methods, feel free to adjust the parameters as you please. Here I’ve outlined the workflow that you should use if you’re new to using them. After every step, except for 1 and 3, you should click Label puncta to see how changing parameters affects your segmentation.
- Select “Difference of Gaussians” from the Method dropdown menu.
- Keep the default parameter settings, choose your favorite label color, and click on the Label puncta button.
- A labels layer named after your image name with the suffix “_puncta” (e.g., your_image_puncta) is going to be added to your layer list.
-
First change the threshold parameter to change the number of puncta labeled based on brightness.
-
Lowering threshold → MORE dim puncta labeled
-
Raising threshold → LESS dim puncta labeled
-
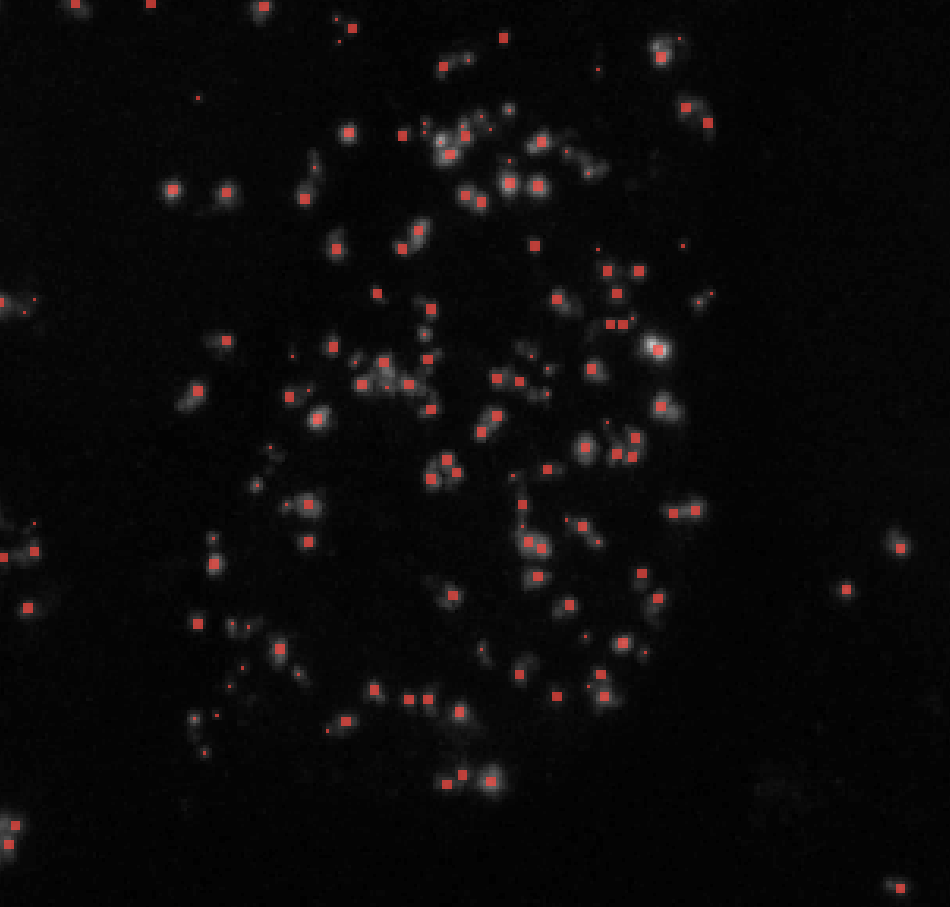
Here’s an example of how the number of puncta labels changes with the threshold parameter:
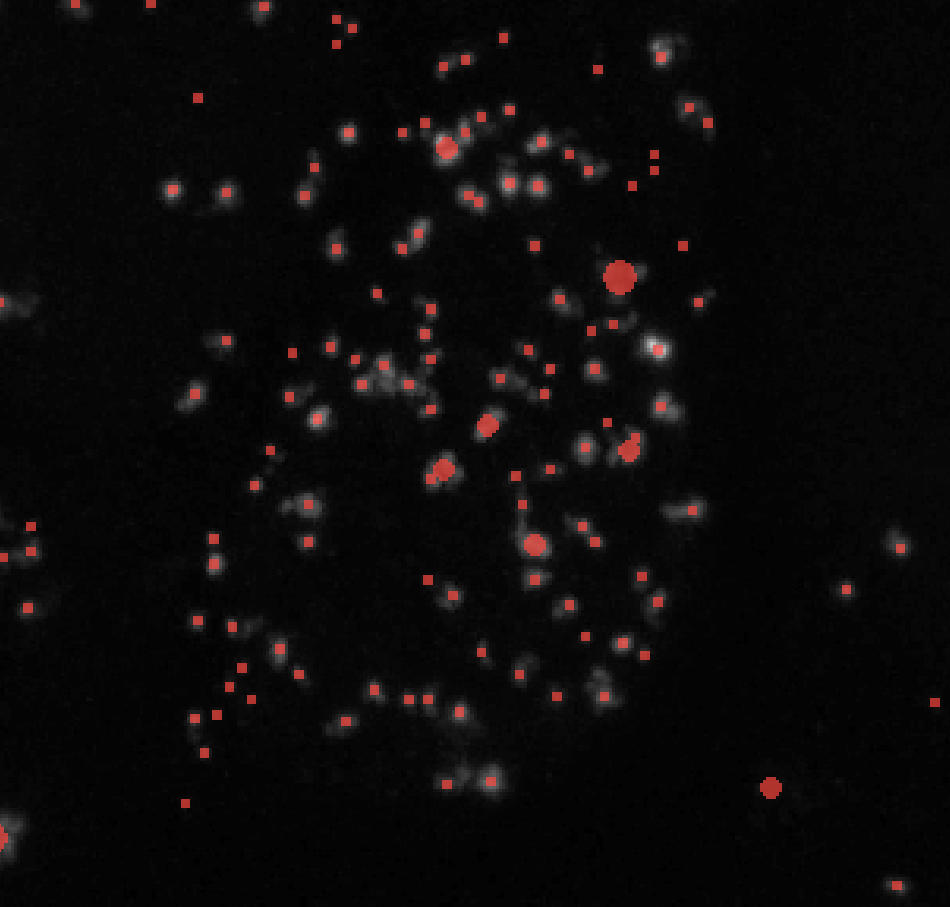
Threshold = 0.01 
Threshold = 0.05 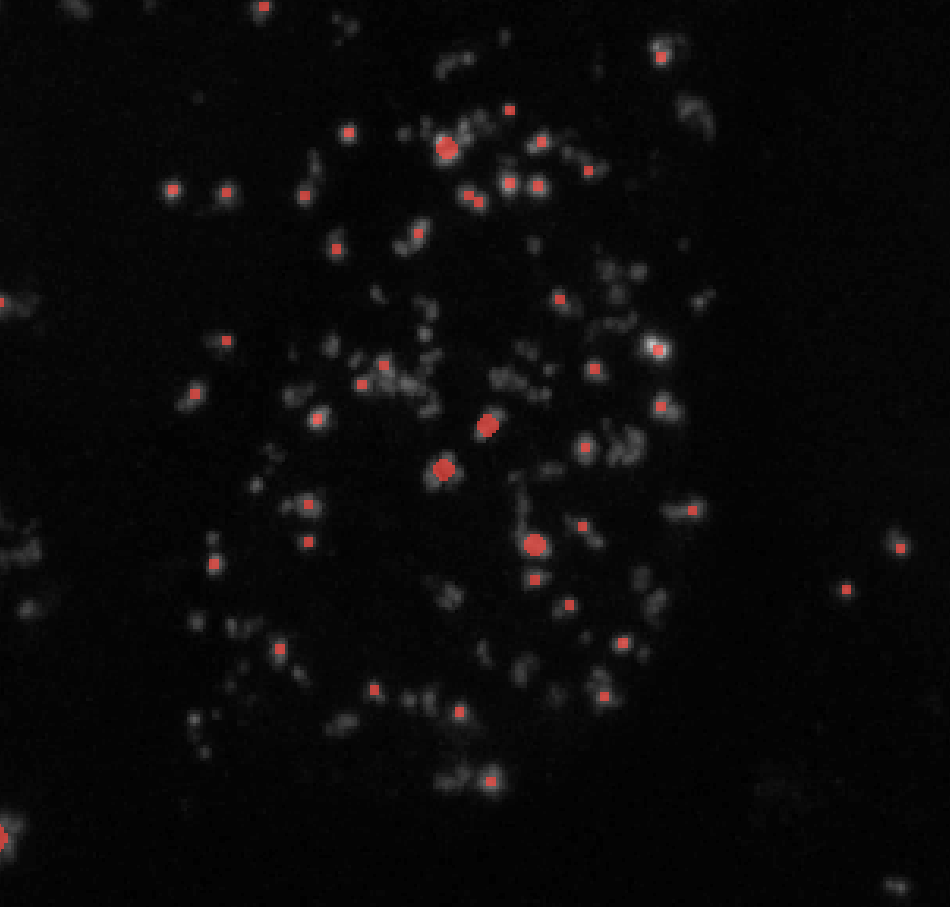
Threshold = 0.1 - If you’re not getting any labels, consider lowering the threshold to a value like 0.0001. It may also be the case that you need to preprocess your image.
-
-
Change min_sigma to lower values to label smaller puncta and higher values to exclude them. min_sigma should always be less than max_sigma. Here’s an example of how changing min_sigma affects your puncta labels while keeping all other parameters constant (here I kept max_sigma = 7):

σmin = 1 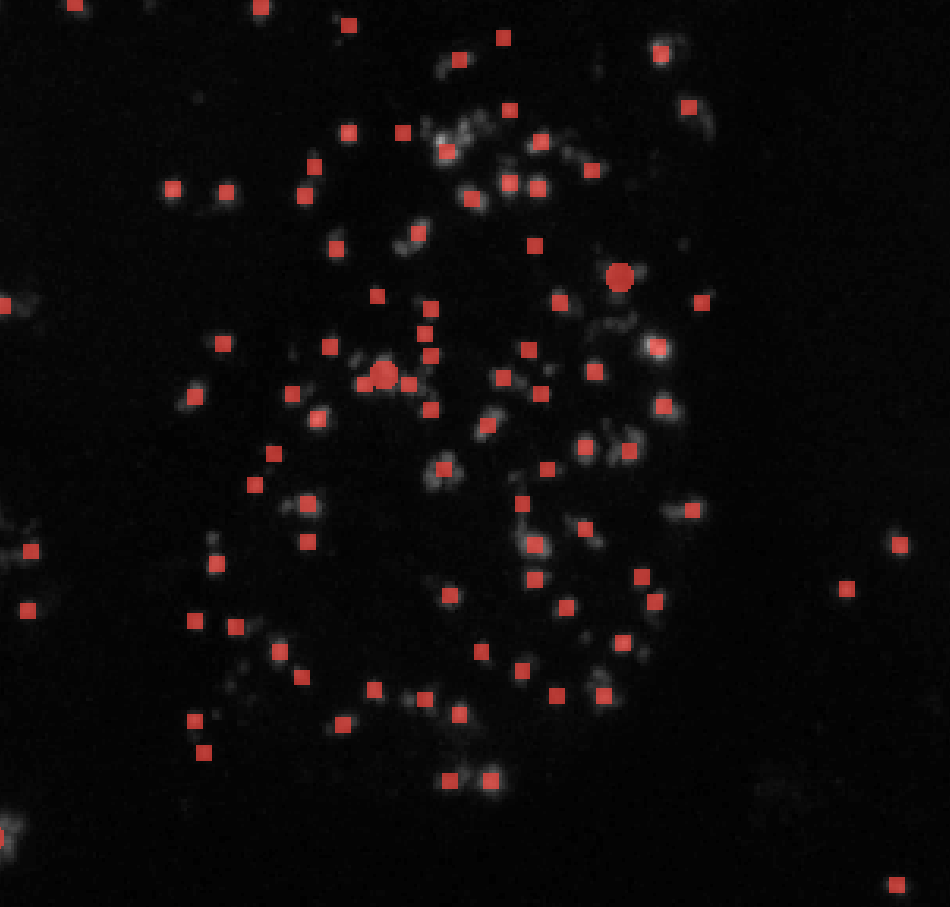
σmin = 3 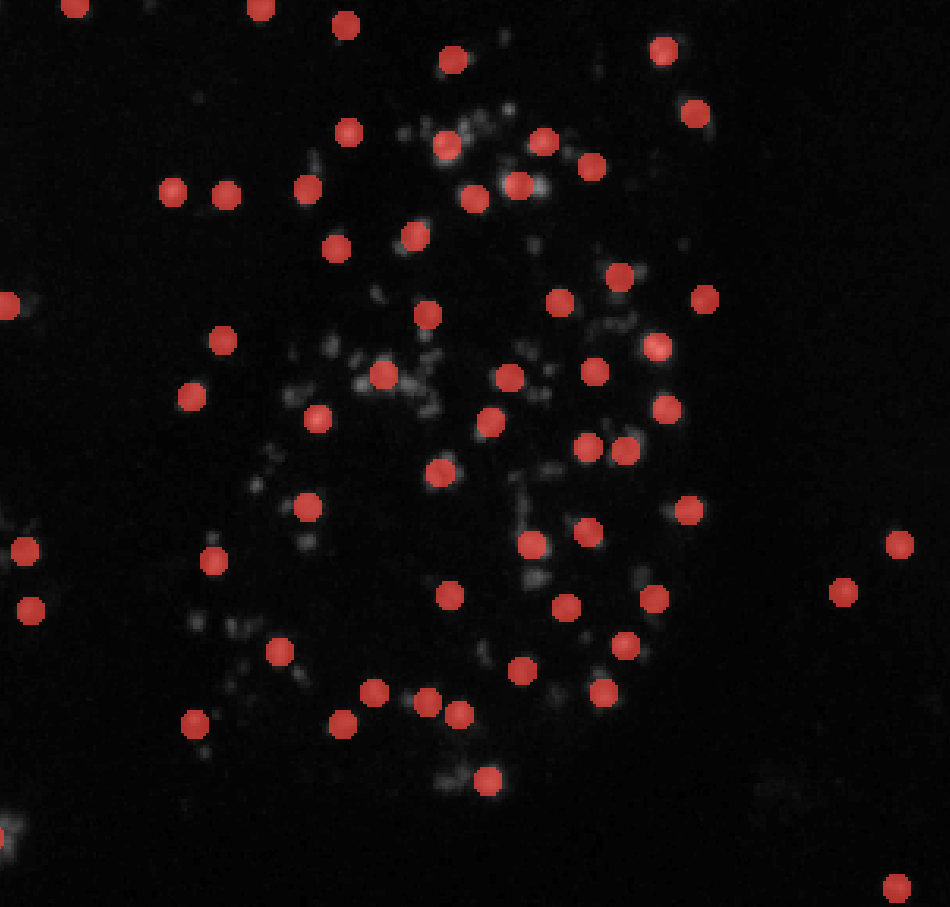
σmin = 5 -
Change max_sigma to higher values to label larger puncta and lower values to exclude them. Here’s an example of how changing max_sigma affects your puncta labels while keeping all other parameters constant (here I kept min_sigma = 1):
σmax = 2 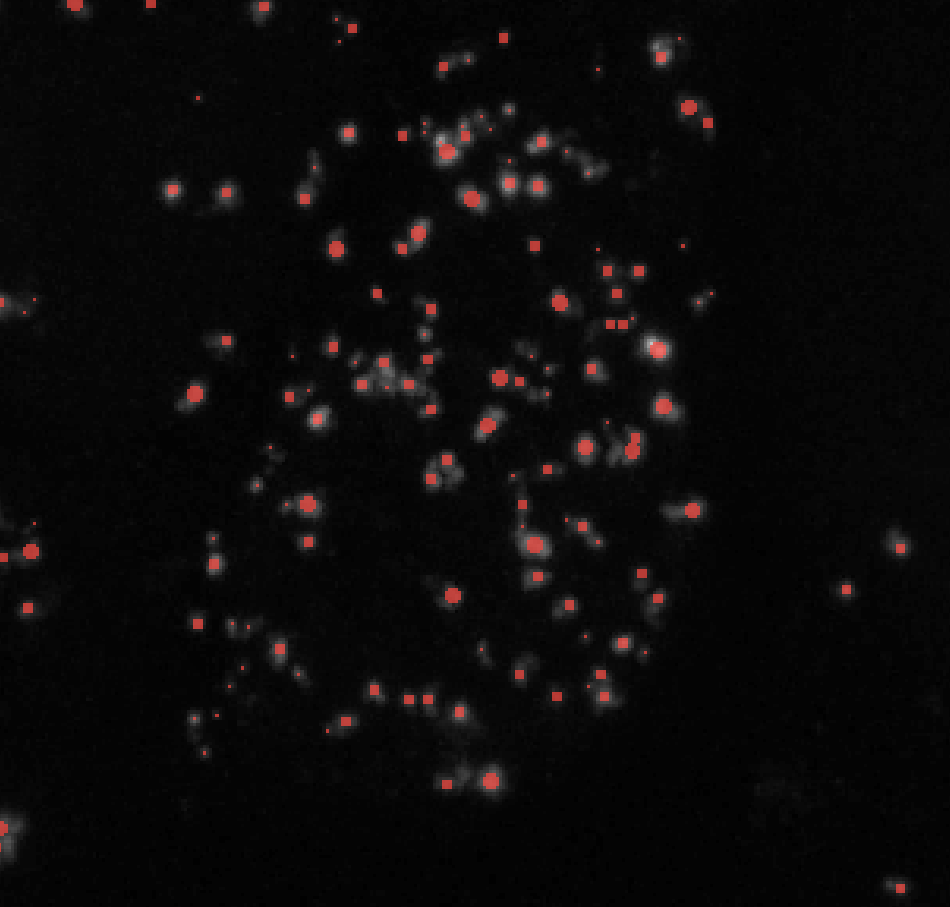
σmax = 4 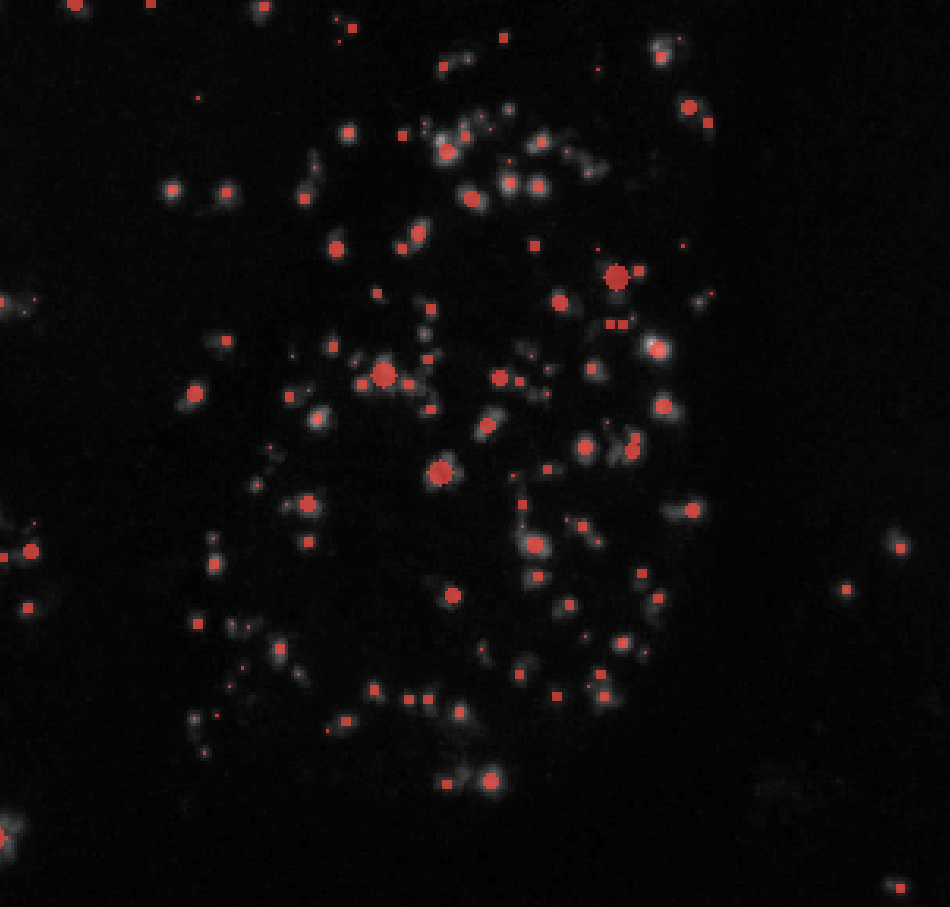
σmax = 6 -
Change the sigma_ratio parameter to change the number of Gaussian-filtered images that are analyzed under the hood. A general set of rules are:
-
Decreasing sigma_ratio → MORE blob detection and SLOWER computation
-
Increasing sigma_ratio → LESS blob detection and FASTER computation
-
Make sure that sigma_ratio is greater than 1.
If you’re using DoH or DoG, num_sigma behaves similarly:
-
Increasing num_sigma → MORE blob detection and SLOWER computation
-
Decreasing num_sigma → LESS blob detection and FASTER computation
-
-
Change the overlap parameter to control how much two blobs are allowed to overlap with each other before one of them is discarded.
- Overlap close to 1 → Many overlapping labels are kept, good for clustered puncta
- Overlap close 0 → Few overlapping labels are kept
Note: I find that setting the threshold to 1 and having min_sigma at around 1 - 3 works best for segmenting clustered puncta. This is especially useful for creating seed points for watershed segmentation.
- Continue to adjust your parameters until you have puncta labels you’re happy with.